


Jump To: Support > KB > ThinIT > Hardware
Hardware details for TCX, AtomIQ, AtomIQx1, AtomIQx2 and AtomIQx3 thin-clients and micro-PCs
Determining model type
From the front, AtomIQ clients have a black or silver panel, whereas the vast majority of TCX clients have a blue or purple front (the very latest TCXs have a silver panel). AtomIQx1 and AtomIQx2 clients have a black front panel. AtomIQx3 clients have a gold front panel:

At the rear, AtomIQ and AtomIQx2 clients have two Ethernet sockets, whereas TCX, AtomIQx1 and AtomIQx3 clients only have one:
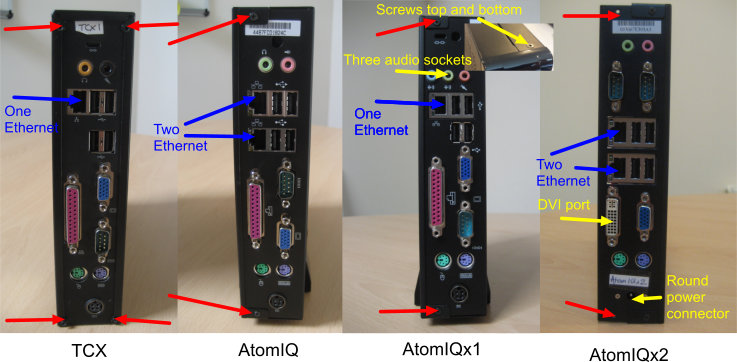
AtomIQx2 clients have a round power socket instead of a 4-pin socket. They also have a DVI monitor connector instead of the parallel printer port. AtomIQx3 clients have HDMI, DVI and VGA, but no parallel or serial ports.
AtomIQx1 clients have 3 audio connectors, AtomIQx3 clients have 6 audio connectors, all other models have just 2. AtomIQx1 clients also have screws at the top and bottom.
- Click here for a tour around the various models of TCX motherboard
- Click here for a tour around the AtomIQ motherboard
- Click here for a tour around the AtomIQx2 motherboard
- Click here for details of the AtomIQx3 connectors
- Click here for details of power supplies
- Click here for details of moving the internal power cable on an AtomIQx1
Opening an AtomIQ, AtomIQx1, AtomIQx2 or AtomIQx3
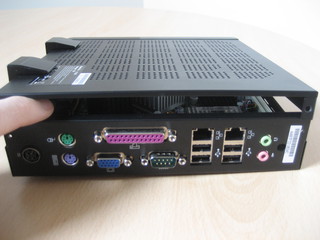
AtomIQs have a two-part case cover and the metal is perforated. Only one case panel needs to be removed. From the rear, you will see two screws on the left-hand panel (one top and one bottom). See red arrows above. Remove these screws and the panel will lift off.
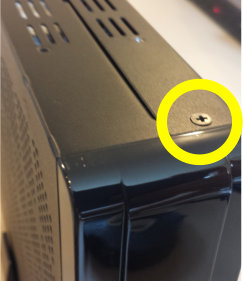
On AtomIQx1 clients, there are two additional screws towards the front, one at the top and one at the bottom of the case:
Opening a TCX
N.B. Newer TCXs have cases like the AtomIQ, so please follow the instructions above.
Most TCXs have 4 screws holding the case on and the case cover is mainly solid. The bottom two are in the very corners and the top two are on the edge of the case, but a small distance down from the top. See the red arrows above. Once the screws are removed, the whole cover will slip backwards:
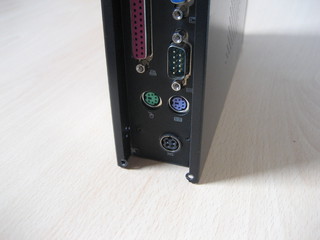
The cover can then be tilted up and removed:
