

OffsiteWindows
Jump To: Support > KB > Backup > OffsiteWindows
Backing up Windows servers to Remote Safeguard
- Install the Precedence Remote Backup agent (called backup-setup-1.x.y.exe where x.y is the version number
- Once installed, run the configuration program:

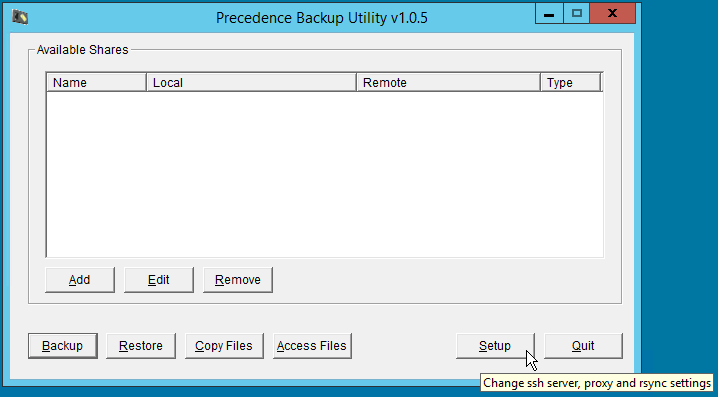
- The configuration window will open. Click on the Setup button:
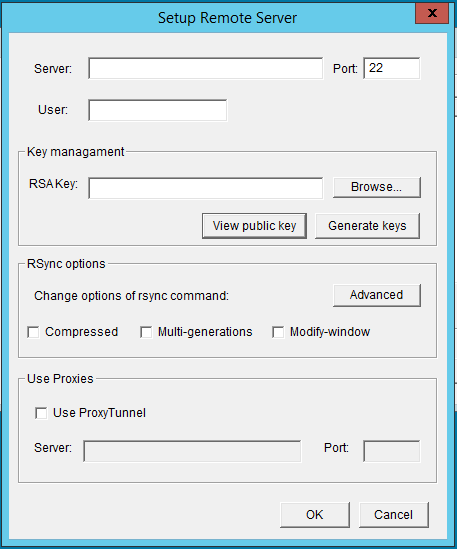
- Firstly, you need to generate the security keys used for access. Click on Generate keys:
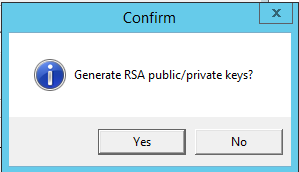
- Then confirm you want to generate the keys:
- Once the keys have been generated, click the View public key button and the key will be displayed in a text window:

- Copy the public key and email it to Precedence for installation on Remote Safeguard
- Back on the main configuration page, complete the following:
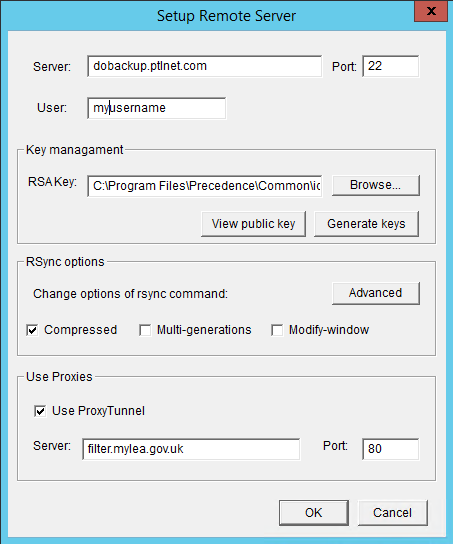
- Enter
dobackup.ptlnet.comas the Server: - Enter your Remote Safeguard username in the User: box
- Tick the Compressed box
- Depending on the firewalling on your Internet connection, you may need to configure the port and proxy settings:
- If you can connect directly out on port 22, leave port as 22 and do not tick the Use ProxyTunnel box
- If you cannot connect on port 22, but can connect on port 443 (https) without using a proxy, alter the port to 443 and do not tick the Use ProxyTunnel box
- If you cannot connect out on either port 22 or 443, you will need to tick the Use ProxyTunnel box and enter the name and port number of your web-proxy
- Enter
- Click OK to return to the main window
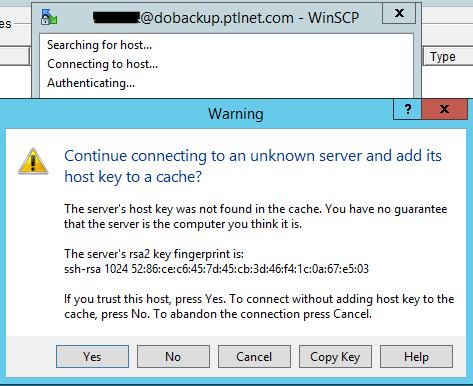
- To check your connection works, click on Access Files. The first time you run this, you will be asked to confirm the server is trusted by clicking Yes:
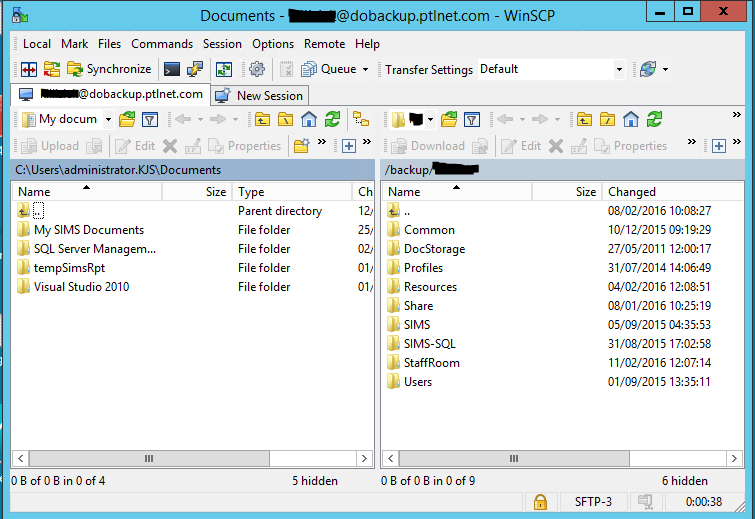
- All being well, you will then see your remote backup location on the right. You would use a similar procedure to restore files and folders:
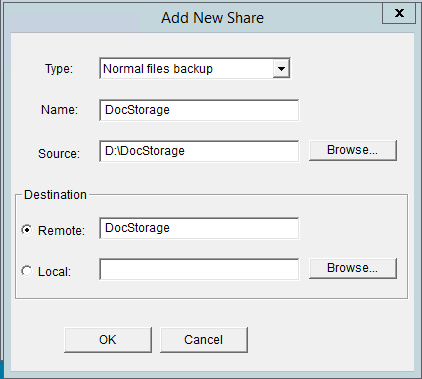
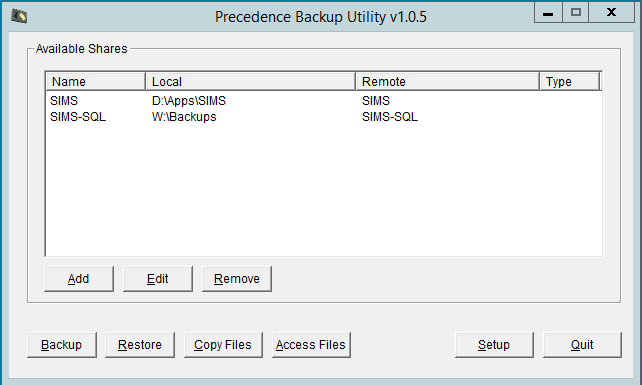
- Back on the main configuration window, click Add to define a path to be backed up. Use browse to pick the folder and alter the Name (just for your reference when looking at the configuration window later) and the Remote destination (the name used on the backup server):
- Once you have added all your backup locations, you can run a manual backup by clicking the Backup button:
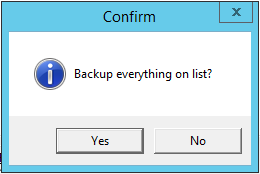
- You will asked to confirm the backup:
- Again, the first time you run a manual backup, you will be asked to confirm that the remote backup server is trusted. Type
yesand hit Return:
- Once the backup has completed, click on Quit and confirm that you wish to save the settings
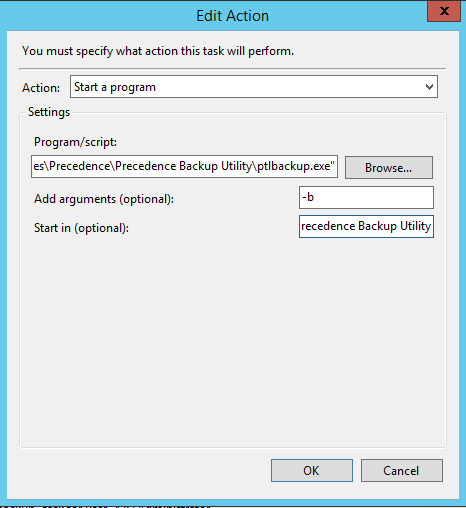
- Once everything is tested, you will probably want to set up a scheduled task to run the backup daily. To do this, use Task Scheduler. When setting up the action, choose
C:\Program Files\Precedence\Precedence Backup Utility\ptlbackup.exeas the program, set-bas the arguments and setC:\Program Files\Precedence\Precedence Backup Utilityas the Start in location.