Jump To: Support > KB > Citrix > Receiver > FileHTML5
File transfer when using HTML5 Receiver or Citrix Workspace for ChromeOS
When using the HTML5 (a.k.a. Light version) of Citrix Receiver, your session is display as a within a tab in your browser. It does not require any other software to be installed. The downside is that for security reasons, it has much less access to resources on your local machine such as storage (e.g. USB sticks). Similarly, Citrix Workspace for ChromeOS runs as a Chrome browser add-in so has similar restrictions.
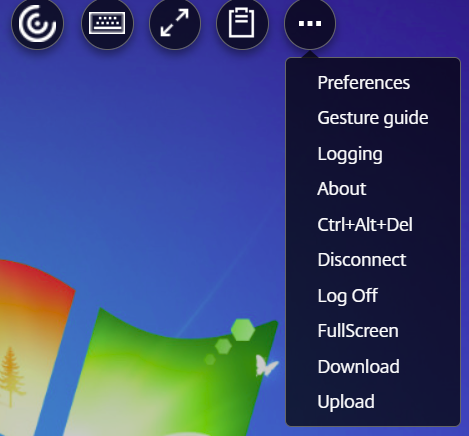
- Within the browser tab, you will see a pull-down button at the top:
 .
.
- Click on this to get a range of buttons:
 .
.
- To upload (i.e copy files from your local computer into your remote session, click on the Upload icon:

- To download (i.e copy files to your local computer from your remote session, click on the Download icon:

- If you are on a touch-enabled device, you will see a different layout without the Upload and Download buttons. In this case, click on the menu icon on the far-right and pick from the menu:
Uploading files
- Click on the
 icon or pick Upload from the menu
- A file chooser will be opened showing files on your local PC. Pick the file to upload
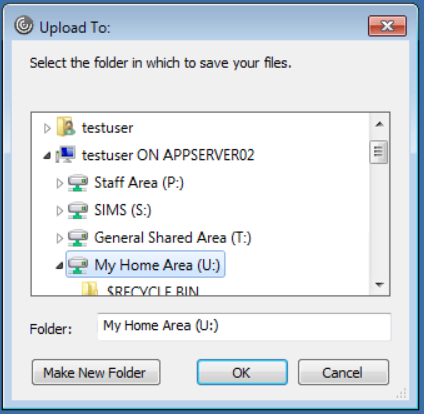
- Next you will be asked to specify the folder to upload the file to. You should probably look for your home drive:
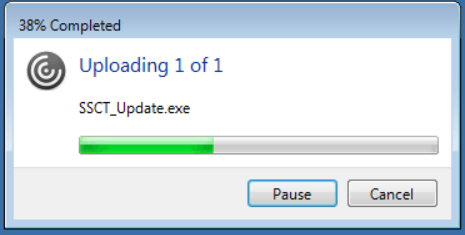
- Click OK to upload and wait for it to complete:
Downloading files
- Click on the
 icon or pick Download from the menu
- A file chooser will be opened showing your Documents folder. Pick the file to download
- Click Open
- Your normal browser download mechanism will now trigger. This may download it straight to your Downloads folder or you may be asked to pick the save location depending on your preferences
Using a Chromebook
Uploading or downloading is very similar to the process described above. The only difference is that you will see the ChromeOS file picker. This allows you to access files on Google Drive, things you have downloaded from other websites or access USB drives. In the screenshot below, a USB memory stick is being used: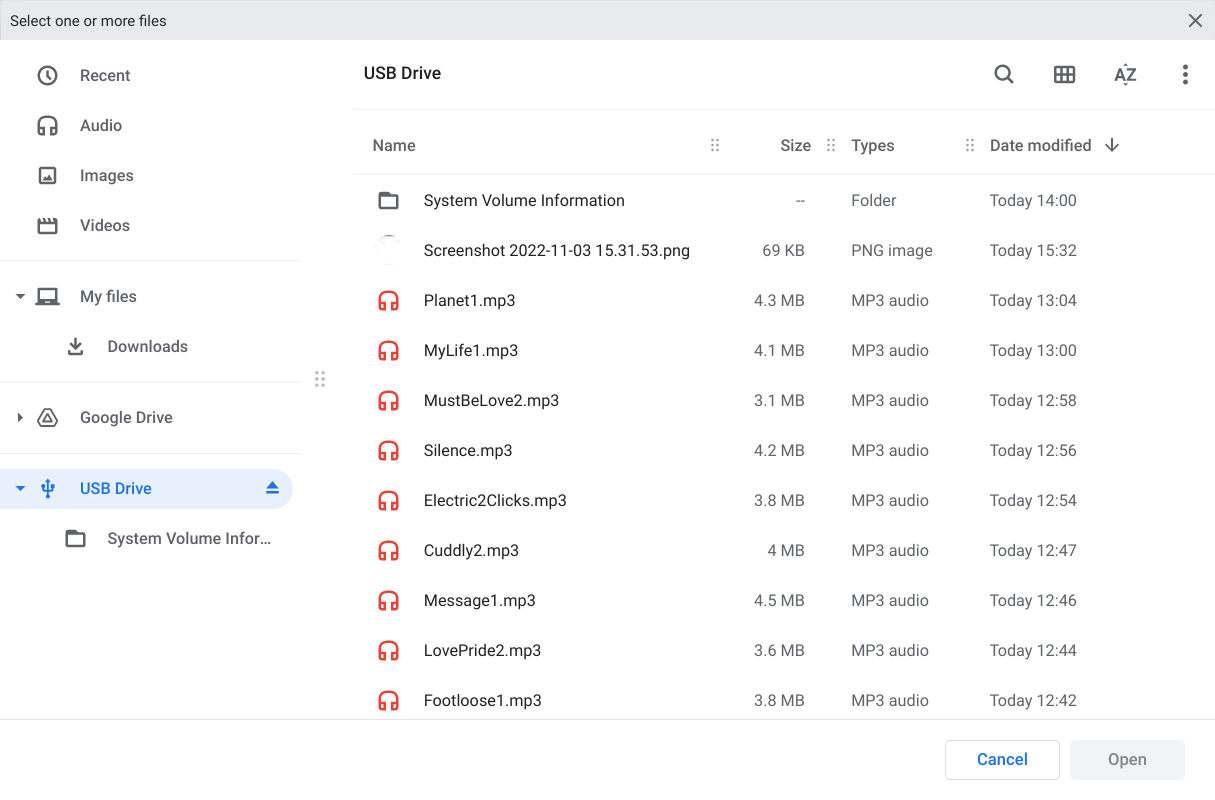
With later version of the ChromeOS Citrix Workspace app, you can map storage on your Chrome device (USB stick, local files or even your Google Drive) to a drive in your Windows session.
To do this, pick the Map a drive option from the '3 dots' menu: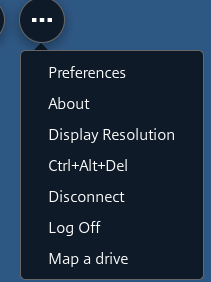
You will shown a screen that allows you to add or remove drive mappings. To add a new one, pick a drive letter (ideally one that you know you do not use within your Windows session) and then click Browse to select what you want to connect the drive letter to: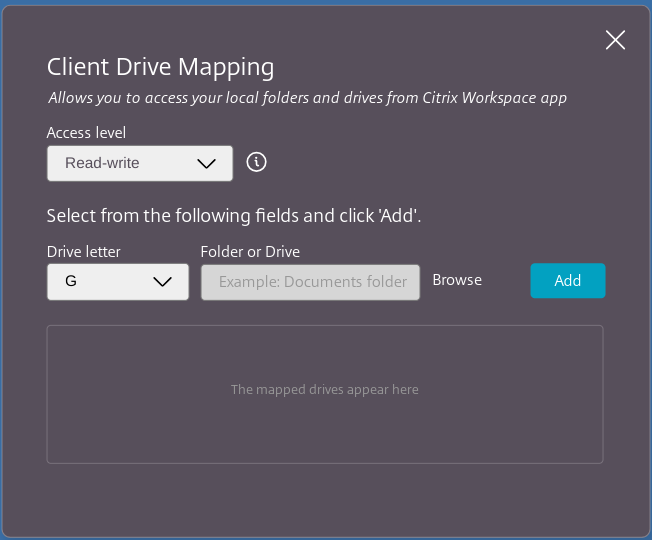
To connect to your Google Drive, select Google Drive > My Drive (or pick a shared drive):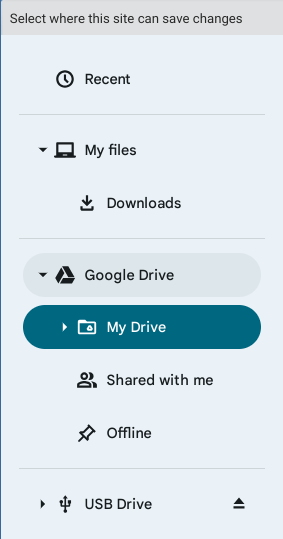
To connect to a USB stick, pick USB Drive: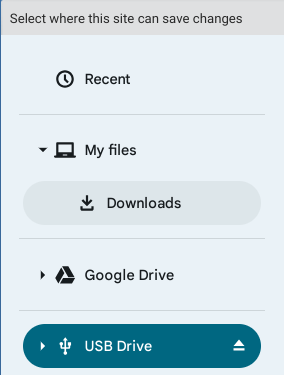
When you have selected what you want to access, click Open and you will then be asked to confirm that you wish to give Citrix Workspace access to it:
Back on the list of drive mappings, you can click Add:
The mapping will be added, but it is likely to say Restart required next to it. This does not mean you have to restart your Chromebook (though that would work), you just need to disconnect and reconnect to your Citrix desktop. You can do this by picking Disconnect from the 3 dots menu and then logging in again:
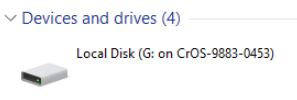
Once you have logged in again, you will see the newly mapped drive in my computer: